CUDA Tutorial 01 - Ocelot |
GPU Ocelot is a powerful tool for emulating CUDA enabled devices. It allows you to program and debug CUDA programs without the need for a CUDA device installed in your computer. This tutorial is meant to get you up and running with the CUDA computing platform utilizing Linux and the GPU emulation software GPU Ocelot. This tutorial has been tested with Ubuntu 11.10 desktop 64 bit. Although the cuda runtime version installed during this tutorial is 5.0 (up to compute capability 3.5), the emulator software so far only supports runtime version 4.0 (up to compute capability 2.1). If you have no idea what that means, just ignore it.
The installation procedure is quite painstaiking. Although there are packages available online at the project homepage (http://code.google.com/p/gpuocelot/) for Ubuntu 11.10, a simple installation was not possible for me. Instead a custom build was necessary. Please consult the project homepage and find out, if your linux distribution is supported and how to install gpuocelot. Maybe the installation packages work for you. Just try them.
The procedure described below is what worked for me on a clean Ubuntu installation, though as there are many package installations involved, more current software might render this procedure useless. This tutorial is based upon the installation manual found at the GPU Ocelot project page (http://code.google.com/p/gpuocelot/downloads/detail?name=Ocelot_Installation_Manual_August_2012.pdf) and the tutorial found at http://barefeg.wordpress.com/2012/06/16/how-to-install-gpuocelot-in-ubuntu-12-04/. Good luck to you!
First, some dependencies have to be fulfilled. Open a terminal and type
The second command is necessary for OpenGL-samples provided with gpuocelot and is therefore optional.
Although described as an optional step in the installation manual, I found that not installing llvm makes the installation process of GPU Ocelot abort. In your terminal, navigate to some arbitrary location of your liking (e.g. your desktop) and type the following commands. It will take some time. The revision I checked out is 183394.
You can choose between only installing the gpuocelot program or grabbing a package of samples in the process. The second option consumes quite a lot of disk space ( 1.5GB), however, the samples may help you in understanding the paradigm with which gpuocelot is utilized. I checked out revision 2235.
In your terminal, navigate to some arbitrary location and type for the full package with samples
or for the GPU Ocelot emulator only
Download and install from https://developer.nvidia.com/cuda-downloads. Be sure to not install the driver as this will abort the installation process if you do not have a CUDA capable device in your computer.
After this installation process, a simple example program will verify that your system is ready to emulate a CUDA device. The specifics of the program given below are not explained. This is the topic of another tutorial.
Create a new folder called “tutorial01o” and in it a file named “main.cpp”. Open it with an editor and copy and paste the following text:
Create another file named “cuda_wrapper.cu” and copy and paste the following program:
Create a file named “configure.ocelot” and paste the following text:
This file essentially controls the emulation of the GPU. If you need to simulate specific devices or have to debug some device code, this is the place to go. Unforunately, the documentation of Ocelot is very.... simple. Here is a very basic description of what can be done with this configuration file: http://code.google.com/p/gpuocelot/wiki/OcelotConfigFile. For preliminary testing of your program, the provided configuration file should suffice.
Create a file named “Makefile” and paste the following commands:
Now everything is in place in order to emulate a CUDA device and test it with this simple program.
Open a terminal, navigate to your project folder (tutorial01o) and type
In that same terminal, type
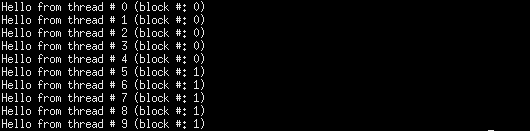
The output should look something like this:
This document was translated from LATEX by HEVEA.